Hi Huneybees,


Wana know how to achieve this look of mine? It's totally effortless and affordable. A clean almost nude look with a splash of pink eyeliner is just what I needed for a day out and here's the basic steps using Maybelline products!

Step 1: Primer - Maybelline Baby Skin Pore Eraser


Maybelline Baby Skin Pore Eraser is a translucent gel primer that promises soft, smooth, pore-free skin after use. It’s a basic primer to blur the appearance of pores and get your skin feeling “baby smooth” with a mattifiying finish and preps skin for foundation and BB Creams, creating a smooth canvas so that your makeup is able to glide on seamlessly. You can use the product as a finishing gel as well, the effects are more obvious too!

Step 2: Foundation - Maybelline Super Mineral 24 Healthy Long Lasting Foundation with Perlite


This darling bottle of foundation had Mai Miyagi doing a spread in ViVi magazine June 2013 issue when it was released in Japan. Every girl was raving about it and I was glad to try it. I have been using this foundation everyday since.
It's light, it lasts throughout the day by holding on to my powder and it's shade suits us Asian's perfectly. With its exclusive Micro-Mineral Perlite technology, it instantly traps excessive oil and sweat, leaving behind a velvety feel.


Step 3: Powder - Maybelline SUPER MINERAL 24 Two Way Cake Foundation

Nothing is as fun as bringing the Girl Power out in you. With the new Super Mineral 24 2 way Cake foundation, comes the limited edition covers that has a choice of either Catwoman or Batgirl on the cover. I was given the Catwoman one, which is just nice the character I prefer more.

This powder also contains Perlite and it sticks to my skin all day. For this instance though, I just lightly brushed on the powder o my face, to set the foundation and so that I won't perspire streaks of beige sweat in the middle of the day due to our warm weather...


Step 4: Eyebrow - Maybelline Fashion Brow Mascara

These brow mascaras are currently my fav, as it makes my brow last throughout the day (don't you hate it when you rub and the brow that you drew is gone?). They come in 2 colors, Rusty Brown and Dark Brown. I'm using the Rusty Brown as I have recently lighten my hair colour.
One thing to love is the mascara wand. Not only is it easy to apply, the rounded tip also helps to build volume to the brow, best for those with thin brows.

One tip when using brow mascara is to back swipe the brow, so that colours get in between the hairs and then brush lightly from inner corner outwards. Not only will this make your brows look fuller, you can also ensure that every strand is coated.

Step 5: Eyeliner - Maybelline Hyper Glossy Runway Pop Liquid Liner
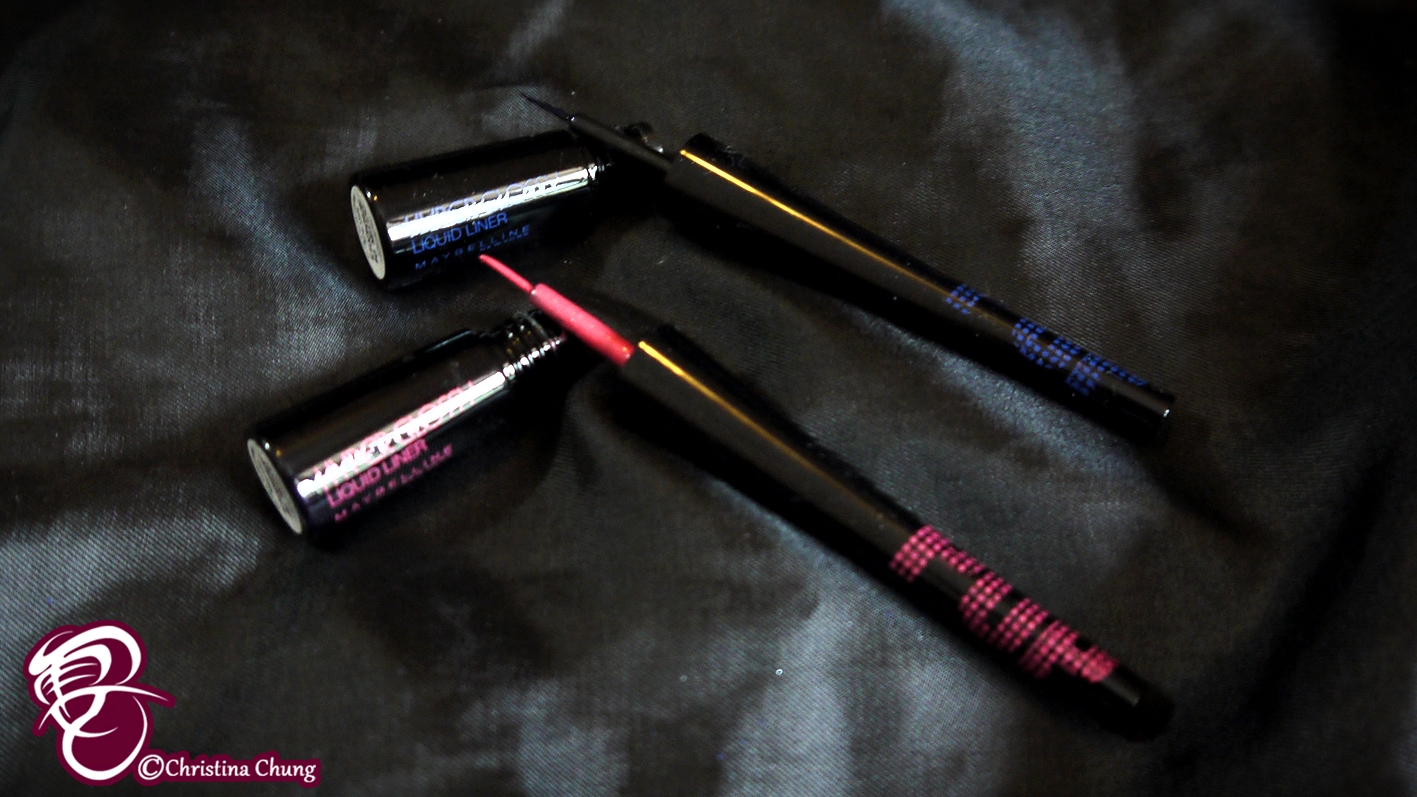
So once you have your nude skin colour eyeshadow on your whole lid, apply this metallic glossy eyeliner. It dries within seconds and totally smudge proof. I have the pink one one and in fact this season, blue is in and less flashy, you can give it a try too!

Step 6: Eyeliner - Maybelline Lasting Drama Pen Gel Liner

After the pink eyeliner, I still had a thin black line along my lashes. This trick is to make your lashes look fuller and also make the pink pop even more whilst, widening your eyes. So here, I'm using the new Maybelline Lasting Drama Pen Gel Liner.

What's special is that normal gel liners come in a pot with a brush, which is troublesome. So for this, you simply have to twist the knob at the back of the pen for some gel liner and you can either apply it directly or on the back of your hand before drawing your eyeline.

The black is intensive and what's amazing is before it really dries and set in, you can still smudge it. After which, the eyeline will stay intact. And what's best is that you can control the thick and thin of the line with the soft silicone pen tip.

So, there you have it! These are the simple steps to add a little colour to your daily makeup look. Simply finish it with some blushers and lip gloss, you are set to go! And at the end of the day, you have to try this new product to remove your makeup.

It removes makeup and cleanse your face in one easy step. Introducing the Maybelline Clean Express Miracle Oil-Gel. This unique 2-in-1 oil-gel remover & cleanser instantly dissolves stubborn & water-proof makeup while cleansing your skin at the same time with its Moringa seed extract - a super powerful purifier.
All I have to do is squeeze a 50c coin amount of the gel and rub it all over my face, the gel will slowly melt my makeup away and when you wash off, not only is the makeup removed, there is oily residue left behind! Totally time saving and especially useful for those who gets so tired at the end of the day, all you want is to sleep soon right?
Hope this tutorial helps and looking forward to seeing more "colours"on the streets.
Thank you Maybelline for sending me the products!
Thank you Maybelline for sending me the products!